As an Amazon Associate I earn from qualifying purchases.
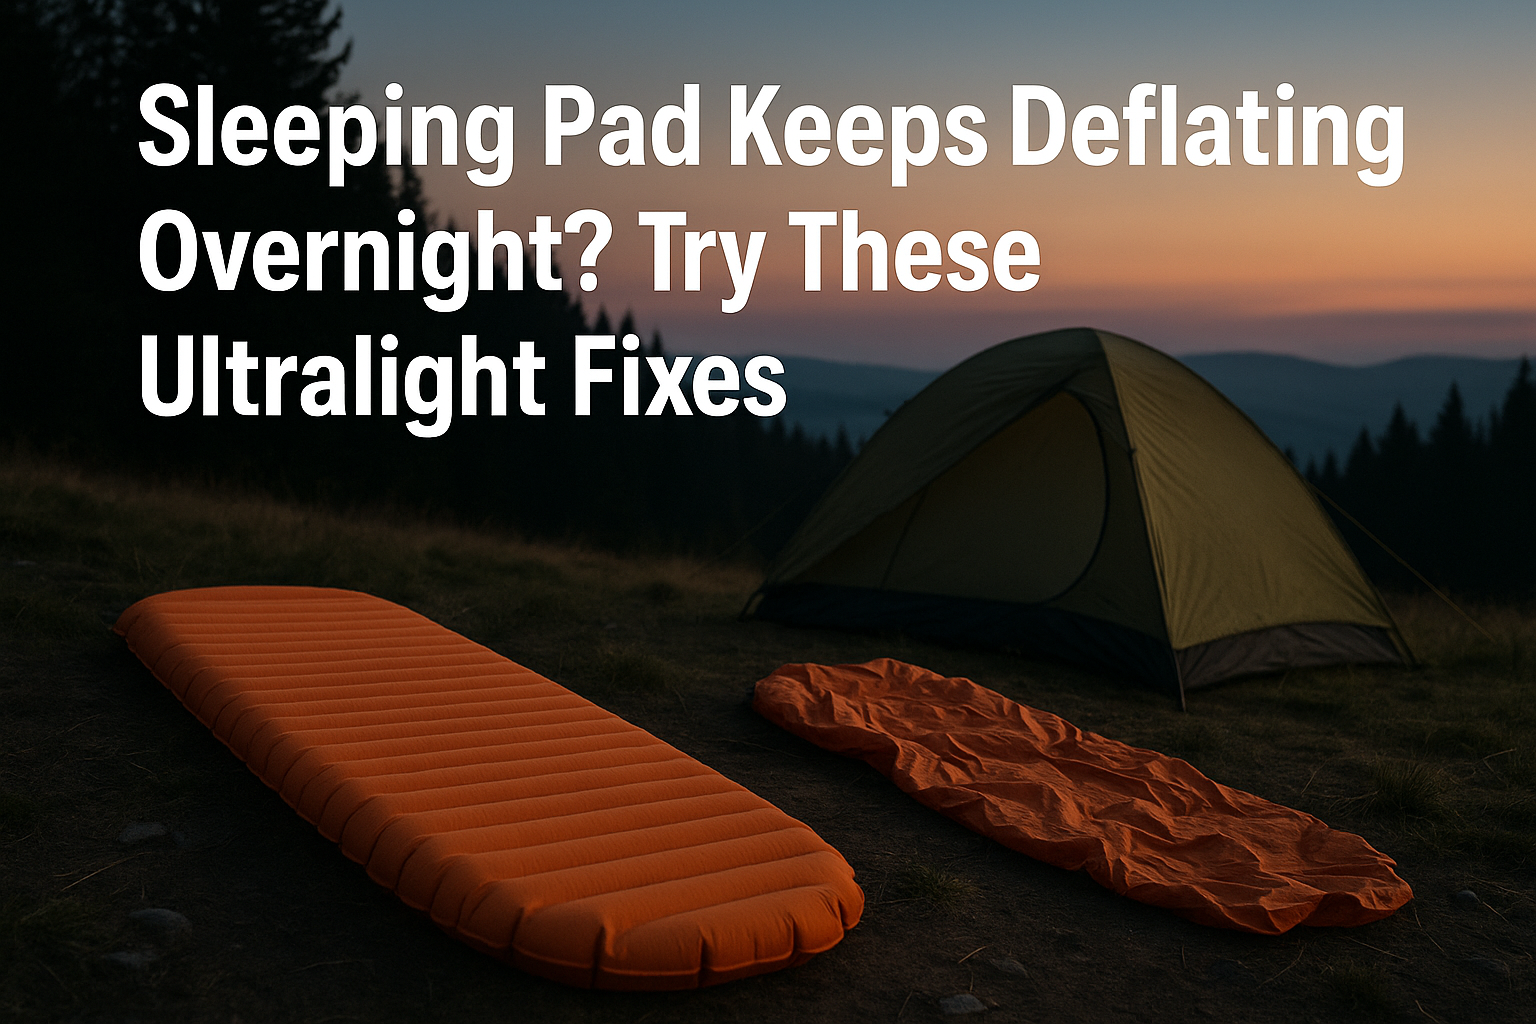
You’ve set up camp. Your tent is perfect. The stars are out. You crawl into your sleeping bag, drift off to the sounds of the forest…
And then it begins.
That slow, sinking feeling.
The cold creeping up from the ground.
Your hips digging into roots.
By 2 a.m., you’re lying on what feels like a glorified tortilla wrap—and your sleeping pad has deflated. Again.
If your sleeping pad keeps deflating overnight, you’re not alone—and you’re not doomed to suffer every time you camp. In fact, with a few clever ultralight fixes, you can stop the leaks, save your back, and sleep like a cloud-hugged mountain goat.
This guide gives you real solutions (no duct tape desperation) for finding the leak, fixing it in the field, and preventing future failures—all while keeping your pack weight low.
Why Sleeping Pads Deflate Overnight (Even If They Seem Fine)
Before we jump into solutions, let’s break down the most common culprits behind the slow deflation mystery:
1. Pinholes or Micro Leaks
Tiny punctures you can’t see or feel—often caused by sharp rocks, pine needles, or even sand grains.
2. Valve Leaks
The valve may look closed, but if dust or debris is lodged in it—or the seal is warped—it can silently release air overnight.
3. Temperature Drop = Air Pressure Drop
Cooler nighttime air causes the air inside the pad to contract, making it feel softer or “flat” even if no leak exists.
4. Delamination or Seam Failures
Over time, bonded seams can fail or bubble, creating slow leaks around edges or internal baffles.
5. User Error (Sorry, but it’s true)
Pads that aren’t inflated fully, sealed improperly, or placed on rough terrain will lose air faster.
Step 1: Find the Leak (Even in the Backcountry)
You can’t fix what you can’t find—so here’s how to locate the problem without a bathtub or garage workshop.
✅ The “Face + Soap” Method
- Mix a little water with biodegradable soap.
- Apply it around the valve and seams.
- Gently press the inflated pad and watch for tiny bubbles.
No soap? Use spit. Not glamorous, but it works.
✅ The “Ear to Pad” Trick
- Inflate the pad fully.
- Place your ear near seams and valve.
- Press slowly and listen for the hiss.
Best done at dusk when it’s quieter.
✅ “Tissue Test” in the Field
- Drape a tissue over suspicious areas.
- Any movement or flapping = escaping air.
Useful when you’re desperate and lacking better tools.
Step 2: Fix It (Without Packing Half a Toolbox)
Here are field-ready, ultralight solutions to get your pad back in sleeping shape:
1. Tenacious Tape + Patch Kit Combo (1 oz or Less)
Tenacious Tape is the gold standard for field repairs. Pair it with your pad’s included patch kit for a nearly permanent fix.
How To Use:
- Clean + dry the area (use alcohol wipes if you have them).
- Apply the patch or tape.
- Press for 30–60 seconds.
- Let it cure for at least 15 minutes before laying on it.
Why It’s Great:
- Works even on wet fabric
- Flexible, won’t peel off overnight
- Adds barely any weight to your kit
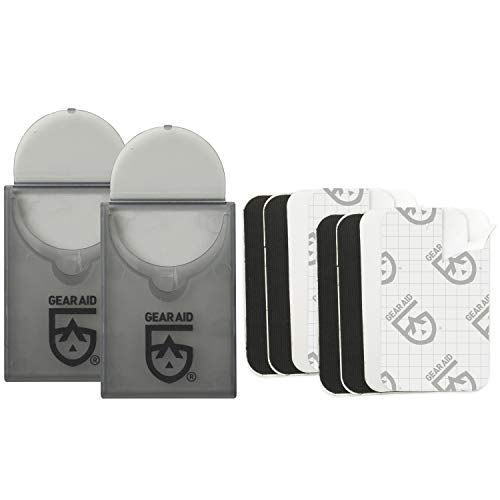
GEAR AID Tenacious Tape Mini Patches to Repair Jackets, Tents and Rain Gear, Black and Clear, 1.5” x 2.5”, 2 Pack
- Repair holes and tears in down jackets, tents, rain gear and other outdoor gear with this fabric, peel-and-stick patch kit
- Use this ultra-strong adhesive tape that permanently bonds to nylon, polyester, GORE-TEX fabric, and vinyl (not for cotton, denim or natural fabrics)
- Cut to size and apply the patches on clean puffy coats, backpacks, ski pants, or gloves; includes six 1.5” x 2.5” and sealed with a waterproof coating
New starting from: 16.59
Go to Amazon2. Ultralight DIY Patch Kit (~0.5 oz)
Don’t want to carry a full repair kit? Make your own with these:
- 2 alcohol wipes
- 1-foot strip of Tenacious Tape (pre-cut squares)
- Tiny ziplock with valve lube (petroleum jelly or silicone-based)
- A safety pin or needle (doubles as gear repair)
Keep it in your first-aid or gear pouch. You won’t even notice the weight.
3. Sealant + Syringe Method (For Bigger Holes)
If you’re dealing with a visible rip or seam bubble:
Packable Version:
- 1 mini tube of Seam Grip or Aquaseal
- 1 tiny syringe (included in some kits or bought separately)
How It Works:
- Inject sealant into the leaky baffle or seam edge
- Smooth it out, let it cure overnight
- Reinforce with Tenacious Tape if needed
⚠️ Not ideal for short overnight fixes—but great for basecamp recovery.
4. Valve Hack: Lubricate & Clean It
A dusty or crusty valve can leak even if it looks fine.
Fix It Fast:
- Clean around the valve with alcohol or clean water
- Apply a dab of lip balm, Vaseline, or silicone lube to the seal
- Open/close it a few times to work the seal clean
Why It Works:
Sometimes your pad isn’t leaking—it’s just not sealing right.
Step 3: Prevent the Leak Next Time
Now that you’ve handled the crisis, let’s make sure it doesn’t happen again—especially if you’re hiking solo or deep into the backcountry.
✅ Always Use a Ground Sheet or UL Pad Protector
Even the toughest pads wear out when placed directly on rocks, sticks, or pinecones.
Ultralight Options:
- Polycro ground sheets (~1 oz)
- Tyvek cut squares
- Folded emergency blanket (multi-use)
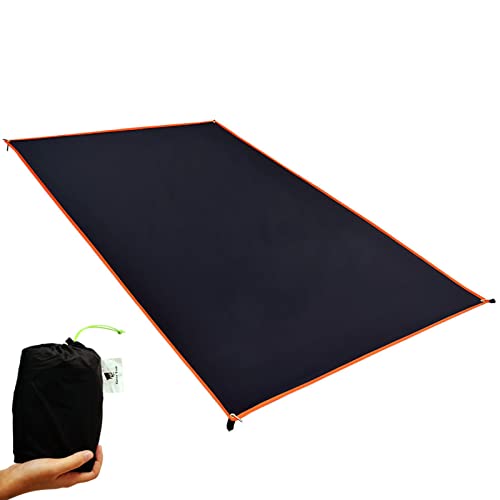
GEERTOP Tent Footprint Ultralight Tent Tarp for Under Tent, Waterproof Ground Cloth Mat for Outdoor Camping Hiking Backpacking
- ➤MULTIFUNCTIONAL TARP: The footprint can be used as tent tarp, picnic mat, beach mat, and for camping. And it’s also perfect to use to make a barrier against the wind and sun, a must-have for outdoor activities.
- ➤DURABLE & WATERPROOF: The footprint is made of 20D Nylon Cloth which durable enough to prevent abrasions and punctures. And the fabric is treated through double-sized siliconized to let the water resistance level equals to PU8000MM, which means it can be filled with water and is still watertight!
- ➤PORTABLE & COMPACT: It can be packed into a compact size, comes with a drawstring pouch provides added convenience for carrying and travels.
New starting from: 21.99
Go to Amazon✅ Pre-Inflate + Test At Camp
Before committing to a spot:
- Inflate your pad fully.
- Leave it sitting on your tent floor for 10–15 minutes while you set up the rest.
- If it’s soft when you return—deal with it before dark.
Why It Matters:
Trying to repair a leak in the dark after dinner is misery. Early detection = chill evening.
✅ Don’t Overinflate Before Sleeping
As temps drop, air contracts. Overfilled pads become too rigid, stressing seams.
Inflate until firm, then release a tiny bit of air before lying down.
✅ Rotate Sleeping Position & Pressure Points
If you always sleep on one side, your pad’s internal baffles and seams can wear unevenly.
Tip: Flip the pad once per trip. Even out the wear.
✅ Pack Smart to Avoid Punctures
When storing your pad:
- Keep it away from sharp cook gear, tent stakes, or crampons
- Roll it loosely—not overly tight
- Use a soft cloth stuff sack or fold it inside your sleeping bag
Bonus: Emergency Backup Options for the Desperate
Even with your best efforts, sometimes you’ll wake up flat. If you’re out of tape and options:
🛟 Use Your Backpack as a Sleeping Base
- Lay your empty pack under your torso or hips
- Stuff it with clothing to reduce pressure points
Better than nothing—and it preserves warmth.
🛟 Layer Clothes + Rain Gear Under Your Sleeping Bag
- Lay out your jacket, dry bag, or rain shell
- Create a buffer between you and the cold ground
May not be cushy, but insulation > comfort when you’re in survival mode.
🛟 Sleep Pad Sandwich
Got a friend or extra foam pad? Stack your deflated pad under the working one to preserve insulation.
If all else fails: sleep diagonal and use your backpack under your knees.
Final Thoughts: Don’t Let a Flat Pad Flatten Your Trip
A deflating sleeping pad can feel like a trip-ruiner. Cold, discomfort, poor sleep—it all piles up fast.
But with the right tools (and mindset), you can:
✅ Find the leak
✅ Patch it fast
✅ Prevent it next time
✅ Sleep warm, light, and leak-free
Because nothing kills the vibe faster than waking up with your spine on a rock.
So pack smart. Patch smarter. And sleep like the ultralight wizard you are.
✅ Quick Recap:
- Common causes: micro leaks, valve issues, overinflation, seam stress
- Find leaks using soap bubbles, tissue tests, or your ear
- Fix leaks with ultralight kits: Tenacious Tape, valve cleaning, or sealant
- Prevent leaks with ground sheets, better storage, and pressure rotation
- Backups include using your pack, layering clothing, or borrowing foam