You’re halfway down a remote, rocky trail, and that telltale clatter echoes behind you. Your gear just shifted—again. There’s no time for repacking in a blizzard or rainstorm, and one loose item can spell disaster. Welcome to the world of rough motorcycle camping, where every twist of the trail tests your packing game. Let’s dive into ingenious, field-tested methods to lock your gear down, whether you’re navigating washboard roads, steep inclines, or unpredictable backcountry.
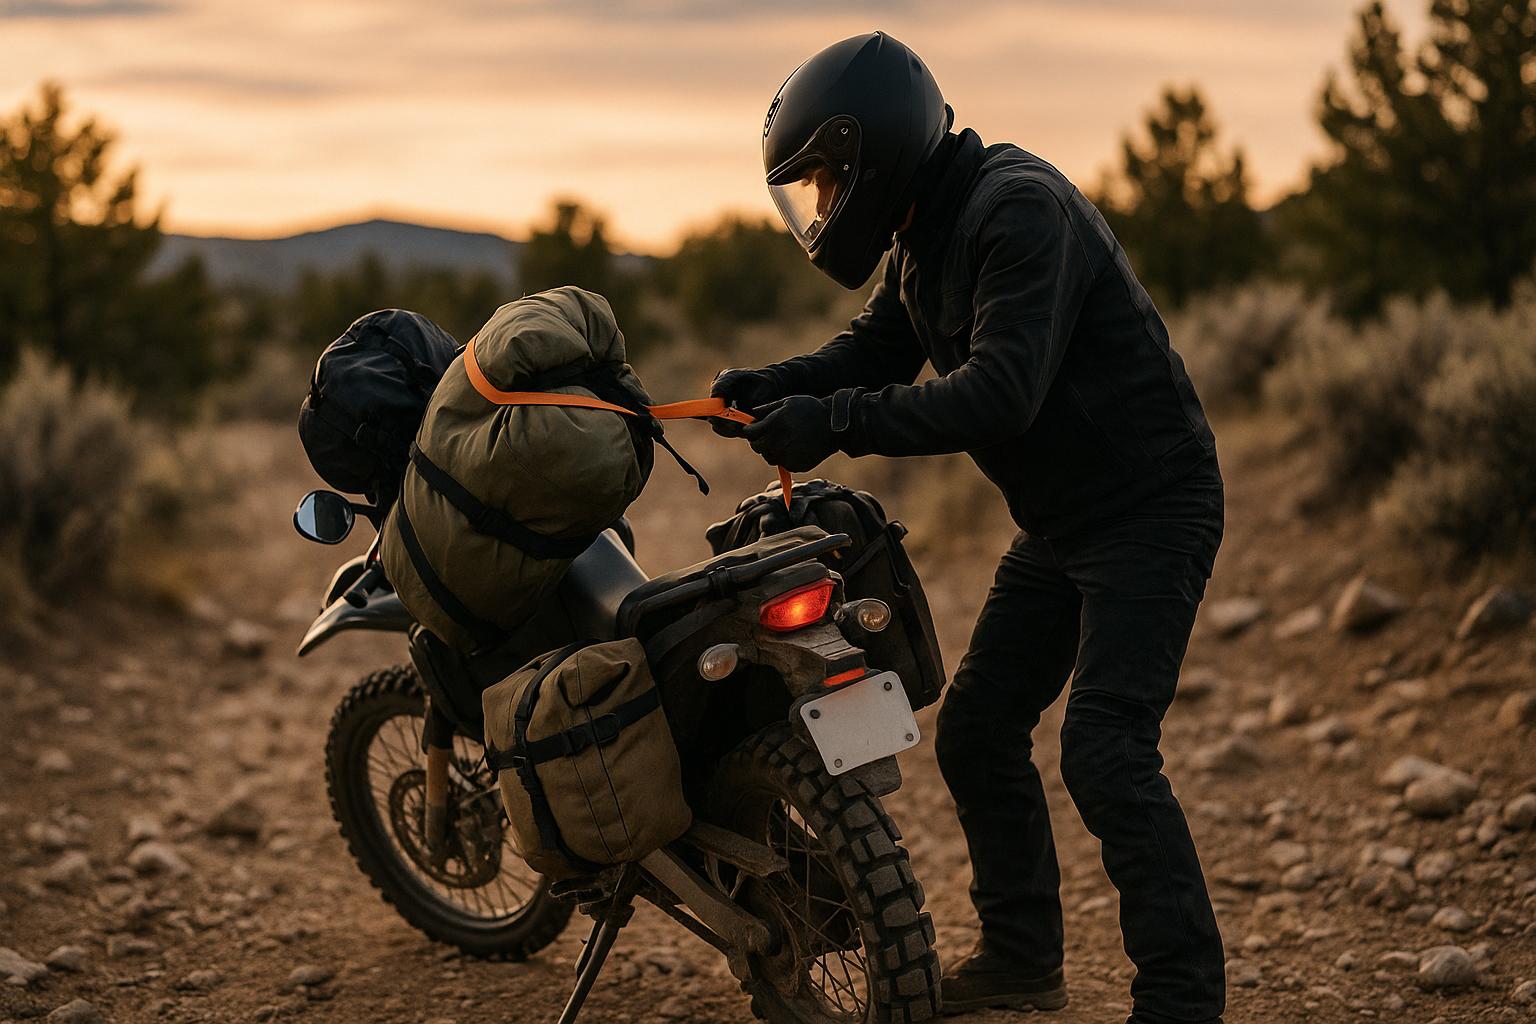
The “Spiderweb” Lashing Method
Forget bungee cords—they fail when the going gets tough. Instead, create a multi-angle web of paracord or flat webbing straps around your gear.
- Start with a strong base layer: Lay out heavier items like water bottles or fuel canisters on the rack first.
- Weave over and under: Crisscross multiple cords tightly at varying angles to cover every side of the load.
- Tie-off points: Use loops through anchor points on your bike’s frame or rack for extra stability.
This webbing method distributes force across the load, preventing bounce and slippage no matter the terrain.
Multi-Layer Packing with Anti-Slip Barriers
Most campers don’t think about friction, but it’s a game changer.
- Layer with rubberized shelf liner or yoga mat pieces between gear and the rack to create a grip layer.
- Use compression bags for sleeping gear or clothing to remove excess air and reduce volume.
- Place low-profile, dense items at the bottom and strap softer bags on top to form a stable load.
Pro Tip: Never stack items that can’t compress under pressure—it’s better to spread them out than risk a shifting top-heavy pile.
The “Silent Load” Tactic for Stealth Camping
When you’re in sensitive areas or wild terrain where noise can attract attention or wildlife:
- Wrap gear in fabric or old clothes to muffle clinks and rattles.
- Secure metal pots and pans inside soft bags, filling gaps with extra clothes or insulation.
- Use carabiners with locking gates to replace jingly hooks or clips on the outside of your pack.
This not only secures your load but also keeps your presence discreet.
Improvised Gear Fastening: Thinking Beyond Straps
Out in the field without proper gear? Improvise.
- Twist paracord with friction knots for temporary lashing when a strap breaks.
- Duct tape critical contact points, especially where vibrations can loosen connections.
- Create soft ties using bandanas or spare clothing, wrapping around gear to bind it to the rack.
Pro Tip: Use quick-release knots like the trucker’s hitch—they provide high tension and can be undone with a tug when you need fast access.
Load Balancing with Geometry in Mind
A balanced load is less likely to bounce.
- Visualize your load as a pyramid—wide at the bottom, narrow at the top.
- Position weight low and centered to reduce sway and impact on handling.
- Keep side panniers symmetrical in both weight and volume to avoid lean.
Tip: Check the bike’s balance at a standstill by gently tilting it side to side. If it tips unexpectedly, adjust the load before setting out.
Strategic Redundancy: Securing the Backup
Even if your main straps fail, backups can save the day.
- Add secondary lashing under the first layer—use lightweight cords or zip ties as a safety net.
- Carry spare webbing or cut-down straps pre-measured for your rack.
- Pack an emergency repair kit with heavy-duty zip ties, safety pins, and a compact sewing kit for on-the-fly fixes.
Using Natural Terrain as a Stabilizer
When camping on uneven or rocky ground:
- Park your bike against a natural anchor, like a tree or boulder, to brace the load while you adjust.
- Lay gear flat against rocks or ground cover, using natural friction to help prevent movement.
- Wedge gear between tree roots or heavy rocks temporarily while repacking.
Tip: Mark your parking spot discreetly with a cloth or stone so you can find it in low light.
The “Friction-First” Approach to Load Testing
Before heading out:
- Apply weight shifts by pushing the bike side-to-side—if anything budges, retighten.
- Ride a short distance and inspect the load for changes. If the gear settles, adjust accordingly.
- Check lashings at intervals—heat, vibration, and bumps can loosen even the tightest rig.
Weatherproofing While Securing
Your load is only as good as its resilience to rain or dust:
- Use dry bags with compression valves to keep gear compact and sealed.
- Wrap electronics or food inside double layers, like a dry bag within a larger waterproof sack.
- Seal strap ends with duct tape or heat shrink tubing to prevent fraying in wet conditions.
Field-Tested Packing Gear to Consider
While these techniques can be improvised, adding a few pro-grade items enhances your setup:
- Voile straps: Ultra-reliable stretch straps that hold tight in all conditions.
- Cam buckle straps: Provide strong, adjustable tension.
- Dyneema cord: Exceptionally strong and lightweight for backup lashings.
Conclusion: Lock It Down, Stay Agile
Rough terrain demands more than just throwing bags on a rack. It requires a calculated system of geometry, friction, redundancy, and creativity. Whether you’re tackling mud-churned trails, rocky mountain passes, or windy plains, these tactics ensure your gear stays locked in place, leaving you free to focus on the adventure ahead. So next time your gear shifts? You’ll already know how to stop it cold.