
It’s not the storm you planned for.
The sky darkens, the wind howls, and the first fat raindrops slap your face. You scramble to unpack your tarp for a quick shelter—only to realize you left the guy lines at home. With no rope to tie it down, your lifesaving cover flaps uselessly in the wind, threatening to leave you exposed.
In a survival situation, improvisation isn’t optional—it’s your edge. With a compact clothesline, nearby sticks, and ground stakes fashioned from the environment, you can build a solid, weatherproof tarp shelter that holds strong even under pressure.
Here’s your field guide to turning minimal gear into maximum protection when you’re caught in a storm.
🌧️ Why Improvised Shelter Is Critical
- Exposure kills—hypothermia can set in with temperatures as mild as 50°F if you’re wet and wind-exposed.
- Unpredictable weather—storms move fast, especially in mountains and open plains.
- Quick shelter buys you time to recover, strategize, and avoid panic.
🪢 Step 1: Unpack Your Compact Clothesline
Compact camping clotheslines (like the Sea to Summit Lite Line) are ultralight, durable, and often packed into pockets of your gear. Unlike regular rope, these lines:
- Stretch and tension well, perfect for pulling taut across frames.
- Pack down small, taking up virtually no space in your kit.
- Often come with built-in attachment loops or toggles, simplifying setup.
🪢 Step 2: Gather Natural Materials for the Frame
- Sticks and branches – Look for straight, sturdy pieces at least 4–6 feet long. These will serve as upright supports and crossbars.
- Natural ground stakes – Carve sharpened points from green wood or use forked sticks. Rocks can substitute as weights if soil is too soft for stakes.
- Additional branches or logs – For anchoring corners or reinforcing the structure.
🪢 Step 3: Create a Ridgepole with the Clothesline
- Identify two anchor points (trees, or use stakes driven into the ground).
- Thread your compact clothesline between these points, creating a taut ridgepole to hang your tarp over.
- If no natural anchors are available, lash sticks into a tripod or wedge poles securely to elevate the line.
- Tension the clothesline until it’s tight and stable.
🪢 Step 4: Secure the Tarp Over the Frame
- Drape the tarp over the ridgepole.
- Use additional branches as spreaders, inserting them into grommets or corners to pull the tarp taut.
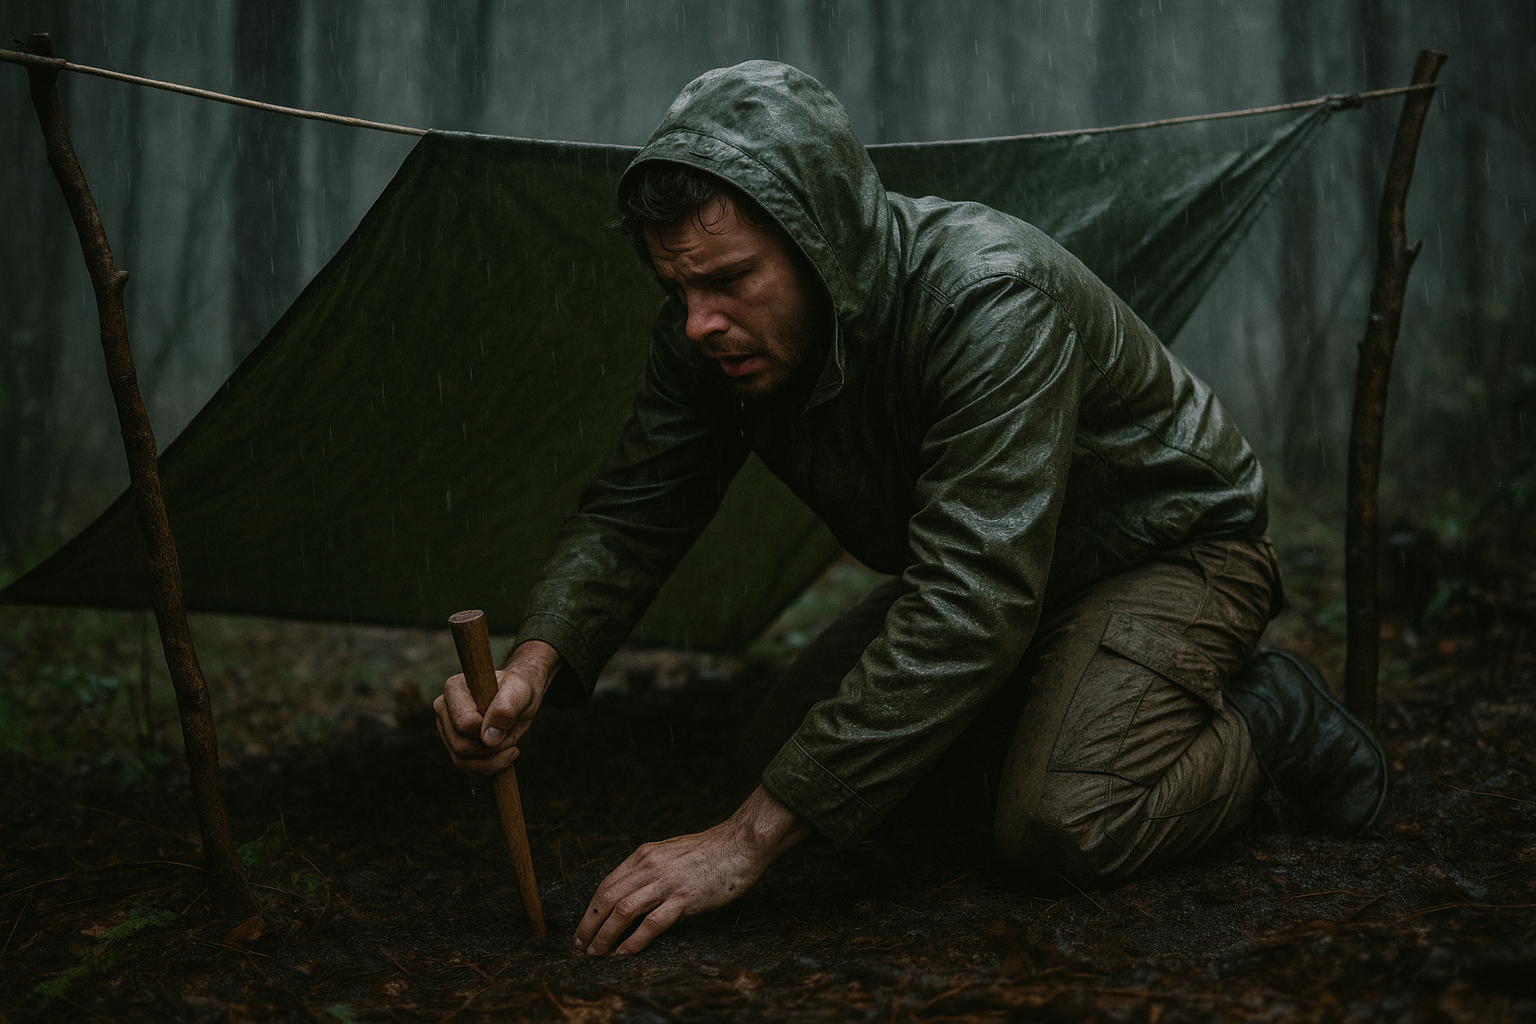
- Stake down the corners of the tarp using your improvised ground stakes. Drive them at a 45-degree angle for maximum hold.
🪢 Step 5: Reinforce and Weatherproof
- Add logs or rocks along the edges to prevent flapping and lift from wind.
- In heavy rain, angle one side of the tarp lower to create a runoff slope, diverting water away from your sleeping area.
- Seal gaps with foliage or moss, if available, to block drafts and spray.
🌲 Field-Tested Improvisations
- No trees nearby? Build a freestanding A-frame using sticks lashed at the top, secured with your clothesline.
- Soil too soft for stakes? Weigh down corners with large rocks or filled dry bags.
- No tarp grommets? Punch holes at the corners or tie off using corner folds and pebbles wrapped in the tarp.
- Windy conditions? Cross-brace uprights with additional branches to create a sturdier frame.
🏕️ Real-Life Scenario: Caught in a Mountain Squall
During a multi-day trek in the Wind River Range, a hiker was caught in a sudden squall with no time to descend to safety. With no guy lines but a compact clothesline, he rigged a ridgepole between two low boulders, draped his tarp, and anchored it with branches and stakes carved from nearby saplings. He stayed dry through the night, while wind and rain battered his makeshift yet sturdy shelter.
📊 Why This Method Beats Waiting Out the Storm
| Method | Pros | Cons |
|---|---|---|
| Clothesline Tarp Frame with Sticks | Quick, field-improvised, weatherproof | Requires scavenging and setup time |
| No Shelter | No effort, but high exposure risk | Hypothermia, gear damage |
| Makeshift Shelter with Random Items | Fast, but unstable | Likely to fail in high winds |
| Tarp Tied to Single Tree or Rock | Simple setup | Flaps in wind, limited coverage |
🎒 Essential Gear to Pack (All Available on Amazon)
✅ Sea to Summit Lite Line Clothesline – Compact, durable, multipurpose.
✅ Reflective Paracord 550 – Versatile survival essential.
✅ Lightweight Tarp with Grommets – Quick-drying, essential shelter.
✅ Camping Knife or Multi-Tool – For carving stakes and cutting lines.
✅ Dry Bags or Rocks for Anchoring – Secures your setup in any weather.
🔥 Pro Tips for Maximum Survival Efficiency
- Practice tarp setups with a compact clothesline at home—so you’re not figuring it out in a storm.
- Choose locations with natural windbreaks—boulders, tree lines, or hillsides.
- Angle the tarp with the wind direction to prevent lift.
- Secure low points tightly to reduce flapping and noise.
- Keep a knife handy for cutting additional stakes or notches.
🚨 Bonus Hack: Multi-Line Frame for Added Strength
If you have extra length of clothesline or paracord:
- Rig a second horizontal line beneath the ridgepole, creating a two-tier structure.
- Use it to hang wet gear, food, or essential items off the ground and under cover.
- In harsh weather, this dual-frame setup adds stability and efficiency to your emergency shelter.
🌲 Conclusion: Build Shelter with Ingenuity, Not Excuses
No rope? No problem. When survival is on the line, a compact clothesline, some sticks, and natural stakes are all you need to rig a life-saving tarp shelter. This technique doesn’t just keep you dry—it keeps you alive.
Don’t wait until the storm’s overhead to figure it out. Practice at home, master the knots, and train your eye to spot natural materials. The next time you face a sudden downpour with no rope, you’ll know exactly what to do.