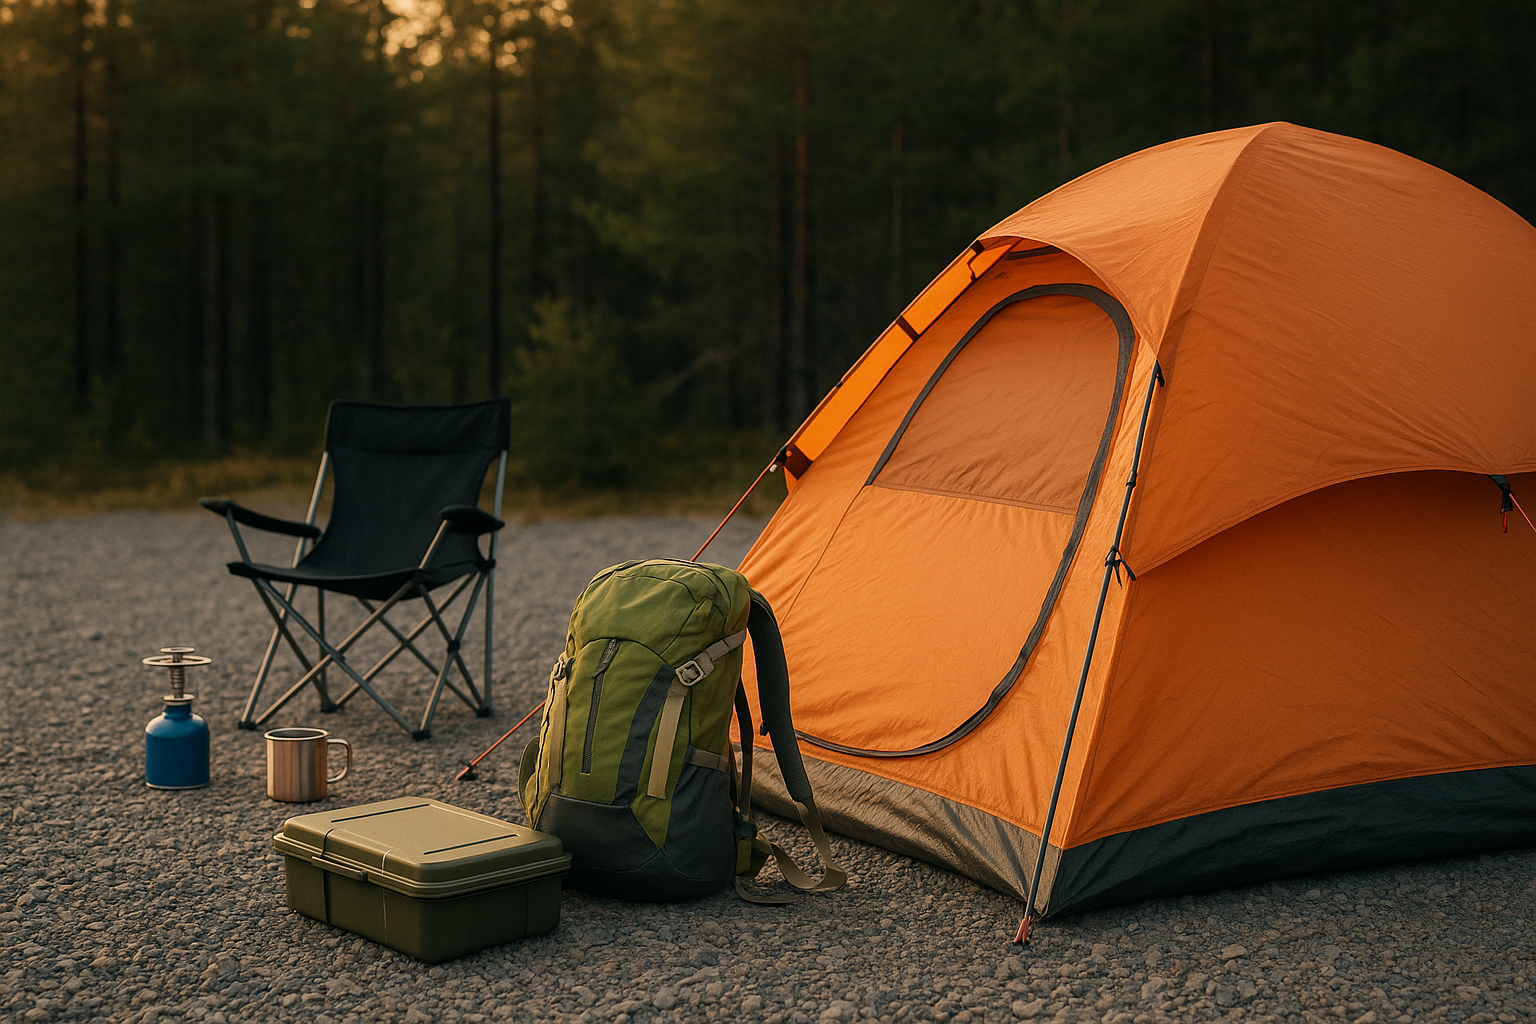
Gravel campsites look like a blessing—level ground, no mud, no bugs. But once you start setting up, you realize:
- It’s cold. Like sleeping-on-a-slab cold.
- It’s sharp. Tiny rock points grind into your tent and gear.
- It’s loud. Every movement crunches like a bag of chips.
- It’s unforgiving. Mistakes in setup lead to torn fabric, bruised hips, and restless nights.
If you’ve ever tossed and turned on hard-packed gravel or woke up to condensation pooling under your pad, you know the pain. But gravel doesn’t have to ruin your trip.
This guide shows you how to camp on gravel comfortably, dry, and damage-free—with smart gear picks, setup techniques, and field-tested hacks that go way beyond “just use a tarp.”
🏕️ Why Gravel Tent Camping Requires a Different Approach
Gravel doesn’t behave like dirt, grass, or forest floor. It doesn’t compress. It doesn’t absorb water. And it doesn’t forgive poor planning. That means your standard go-to setup probably won’t cut it.
Key Gravel-Specific Challenges:
| Problem | Why It Matters |
|---|---|
| Cold from below | Gravel draws heat out of your body through conduction |
| Condensation | Water vapor builds under your tent without airflow |
| Puncture risk | Rocks can slowly shred your tent floor if not buffered |
| Shifting surface | Loose gravel makes stakes and pads unstable |
| Lack of padding | Every bump presses into your hips and shoulders |
You need a setup designed not just to survive gravel—but to neutralize it.
🛠️ Step 1: Build the Right Base—It Starts Beneath Your Tent
Before your tent even touches the ground, you need a layered defense system.
✅ Start with a Rugged Ground Tarp or Footprint
Don’t use a cheap plastic tarp from the hardware store. They’re too slippery, too thin, and tear quickly.
What to Use:
- AquaQuest Defender Tarp: 70D ripstop nylon + TPU coating = nearly bulletproof
- GEERTOP Tent Footprint: Lightweight but built for abuse
- Zeeray Heavy-Duty Camping Tarp: 10 mil, UV-resistant beast
🧠 Pro Tip: Cut or fold your tarp slightly smaller than your tent base to prevent rainwater from pooling underneath.
✅ Add a Shock-Absorbing Layer Above the Tarp
Even the best tarp won’t stop you from feeling gravel under your knees. Add comfort and insulation with one of these:
🧶 Interlocking Foam Tiles (Puzzle Mats)
- Easy to trim to fit your tent
- Adds real cushion and insulation
- Doubles as a play space for kids or a pet area
🧊 Closed-Cell Foam Pads
- Think Therm-a-Rest Z-Lite or similar
- Reflect heat back into your sleeping bag
- Lightweight and virtually indestructible
📦 Bonus Hack: Flattened Cardboard
- It’s not pretty, but it adds warmth and padding in a pinch
- Especially useful for last-minute gravel setups
🧷 Step 2: Protect Your Tent Floor From Wear and Tear
Gravel slowly eats away at thin tent floors. Once the fabric wears through, you’ll start leaking, tearing, and regretting everything.
🛡️ How to Prevent Floor Damage:
- Reinforce corners and high-friction areas with Tenacious Tape before your trip
- Never place heavy objects (coolers, cots) directly on the tent floor—use foam scraps or rubber mats
- Use gear lofts or hanging storage to keep weight off the ground
🧠 Pro Tip: Slide a folded microfiber towel under each sleeping pad valve or cot leg to eliminate movement friction on the floor.
🪨 Step 3: Deal with Gravel’s Worst Offense—The Cold
Gravel gets cold fast—and stays cold. Even in summer. You’ll lose body heat through your back unless you buffer the ground properly.
🔥 How to Stay Warm:
- Layer your floor: tarp → foam → sleeping pad → insulated blanket
- Use a pad with real R-value (3.5 or higher for gravel)
- Stack pads if needed: air pad + foam = warmth + puncture protection
- Throw a space blanket or windshield reflector under your pad to block cold transfer
🧠 Bonus Hack: Use a wool blanket under your pad and another inside your sleeping bag. Wool insulates even when damp and muffles gravel noise.
🌧️ Step 4: Control Condensation and Stay Dry
Gravel sites have excellent drainage—but they also reflect ground moisture and cold air into your tent. Without airflow, you’ll wake up sticky, soaked, or with water between your tarp and tent.
💧 Moisture Control Techniques:
🚪 1. Keep your rainfly vented
- Open top vents, side windows, or use guy lines to create airflow
🪟 2. Use a breathable ground cloth
- If camping in humid climates, skip the plastic and go for a canvas-style footprint that lets moisture escape
🌬️ 3. Create elevation with foam or slatted wood panels
- The more air between you and the gravel, the less chance of condensation forming beneath
🧠 Pro Tip: If you see moisture building, slide an old towel under your sleeping pad to absorb and isolate it.
🧺 Step 5: Keep Dirt and Gravel Outside—Not in Your Tent
It’s not just about comfort. Gravel dust is abrasive. It wears down zippers, seams, and floor coatings if it gets inside your tent.
🧼 The Dirt Defense Setup:
| Tool | Use |
|---|---|
| Welcome mat | Wipe off boots before entering |
| Camp shoes | Leave hiking boots outside |
| Small broom/dustpan | Sweep tent daily |
| Entry vestibule layer | Extra foam pad or towel under door zone |
🧠 Bonus: Use clear vinyl carpet protector in your vestibule or entry space—lets you see dirt buildup and clean fast.
🧱 Step 6: Anchor Smart—Because Gravel Eats Tent Stakes for Breakfast
Gravel tents fall apart fast in wind because stakes won’t hold. The trick? Go unconventional.
🔗 Anchor Methods That Actually Work:
🪢 1. Use Rock Anchors
- Tie guy lines around large rocks in place of stakes
- Works best with adjustable tensioners or paracord loops
🧱 2. Deadman Anchors
- Bury sticks, rocks, or bags filled with gravel in shallow trenches
- Tie your tent to them and pack gravel overtop
⚙️ 3. Screw-In Anchors
- Look for tent anchors designed for gravel or sand
- Twist in by hand or drill for ultra-secure placement
🧠 Pro Tip: Carry a few large carabiners and zip ties—you can attach guy lines to fences, trees, or fixed objects if the ground fails you.
💺 Step 7: Sleep Like a Pro—Even On Rock
Gravel doesn’t compress. So don’t expect it to “flatten out” over time. You need padding, elevation, and airflow to sleep right.
🛏️ Best Sleep System Setup:
- High-R-value pad or cot
- Foam pad beneath for added insulation
- Wool blanket between pad and bag to stop slipping
- Pillow buffer (rolled towel or camp pillow) under knees or lower back
🧠 Bonus Comfort Hack: Use inflatable lumbar support cushions (designed for car seats) under your pad for side or stomach sleepers—adjustable and adds spinal support.
🧰 Bonus: Genius Gravel Gear You Didn’t Know You Needed
Sometimes, the little things make or break the trip.
🧼 Coghlan’s Mini Broom & Dustpan
- Clears grit fast
🛒 Amazon Link
🧲 Magnetic Hooks
- Use on vehicles or gear lockers to hang lights, towels, or food off the gravel
🛒 Amazon Link
🧶 ProsourceFit Puzzle Floor Tiles
- Transforms tent floor into padded, warm, gravel-proof base
🛒 Amazon Link
🔨 Eurmax Nail Stakes (for compacted gravel)
🧾 Final Gravel Setup Checklist
✅ Heavy-duty ground tarp or tent footprint
✅ Foam tiles, closed-cell pads, or wool blanket for insulation
✅ Cold-rated sleeping pad or cot
✅ Rock anchors or screw-in stakes
✅ Entryway mat and sweep gear
✅ Waterproof duffel or tote to elevate gear
✅ Carabiners, zip ties, and Tenacious Tape for damage control
🏁 Final Word: Gravel Doesn’t Have to Mean Pain
Gravel isn’t the enemy—it just punishes bad setups.
The key is treating gravel like hostile terrain, not just a prettier version of dirt. With smart layering, proper insulation, noise reduction, and anchoring that actually works, you’ll sleep soundly, stay dry, and keep your gear intact trip after trip.
So roll in. Set up like a pro. And show that gravel who’s boss.
Because smart campers don’t suffer—they engineer their comfort.